ding
What is ding?
ding is a client-server thing written in python3. Its aim is to execute a set of commands remotely. The commands can be set in the server's config file.
How does it work?
The server will wait for a command to be sent by a client. If the command is present within the server's config file it will then execute the command, else nothing will happen.
What about ding's security?
The authentication is done via a SSL Client Certificate signed by an (self generated) Certificate Authority. The scripts for generating a CA and signing the Server/Client Certificates are also included to make it (relatively) easy. [ This involves typing in a few certificate details and entering a previously defined CA password. ]
Pic or didn't happen

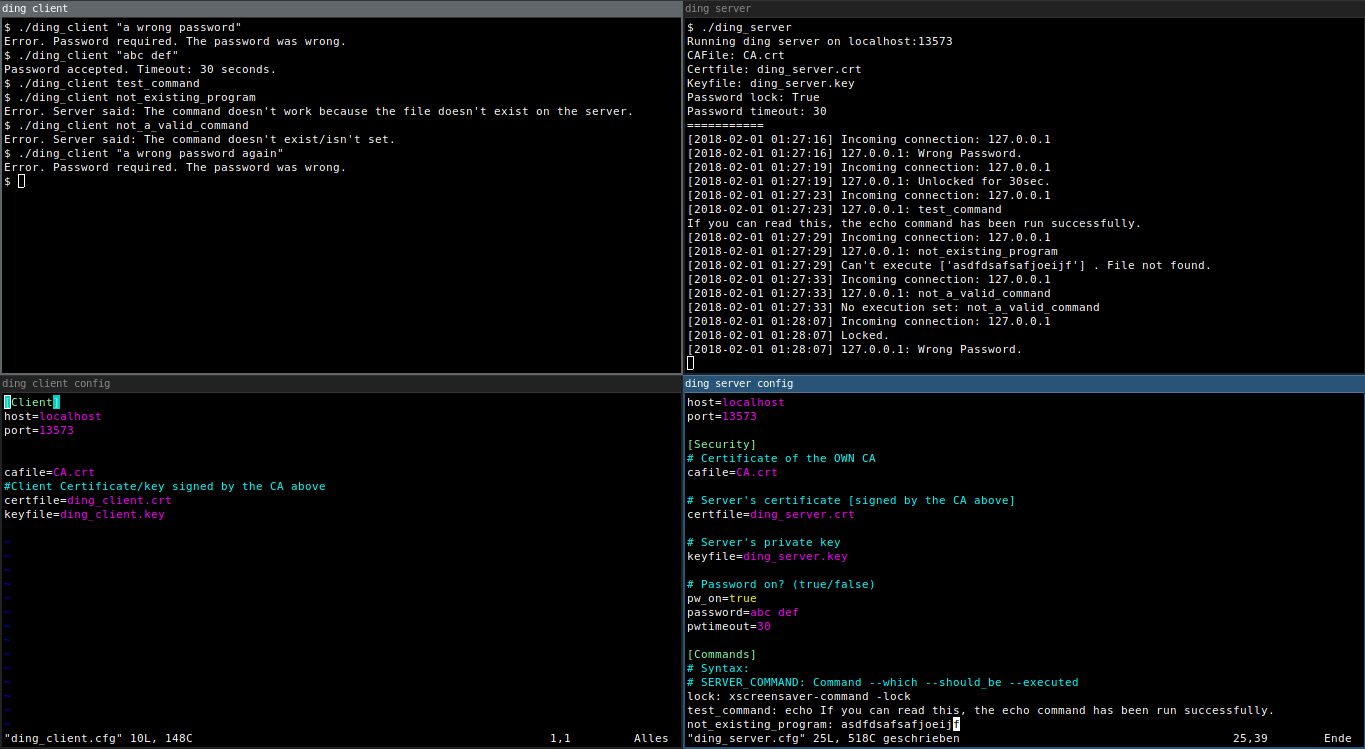
Requirements
- Install python3 on your target computers.
Installation
At every step please read carefully what the generate certificates scripts want from you. The information on the certificates doesn't need to be true and can be totally random. They only need to be different from one another.
Step 1 to 3 can only be run on UNIX or GNU/Linux.
- Run
./1_generateCA.shto generate a CA. - Run
./2_generateServCert.shto generate a signed Server Certificate. - Run
./3_generateClientCert.shto generate a signed Client Certificate. - Move
ding,ding.cfg,ding.crt,ding.keyandCA.crtto the computer which should be able to send commands to the server.- UNIX or GNU/Linux: Also move
ding.cfgto that computer. - Windows: Also move
ding.win.cfgto that computer.
- UNIX or GNU/Linux: Also move
- Do some configuration on the server and client (
dingd.cfg,ding.cfgordingd.win.cfg,ding.win.cfgon Windows). - Start the server using
./dingdorpython .\dingdon Windows. (You may want to put this in a tmux session. [Ctrl+B, D] ;) ). - Try out the client using
./ding <command>òrpython .\ding <command>on Windows.
Optional: Cleartext password with timeout
If you want to be sure that this power won't be abused by bad people using your computer, you may want to add a password (saved in cleartext). The password will be sent inside the TLS connection.
Warning! Beware of the shell history!
You might want to do something like $ history -c after sending the password via the client or play around with bash's HISTCONTROL variable.
How to enable the password
- Open your
dingd.cfgordingd.win.cfg. - Set
pw_on=true. - Set a password, like
password=abc def. - Set a password timeout:
pwtimeout=10for 10 seconds.
If you have a password with special characters as in spaces and the like, you may want to use quotation marks around your password. ./ding "abc def" or python .\ding "abc def" on Windows.